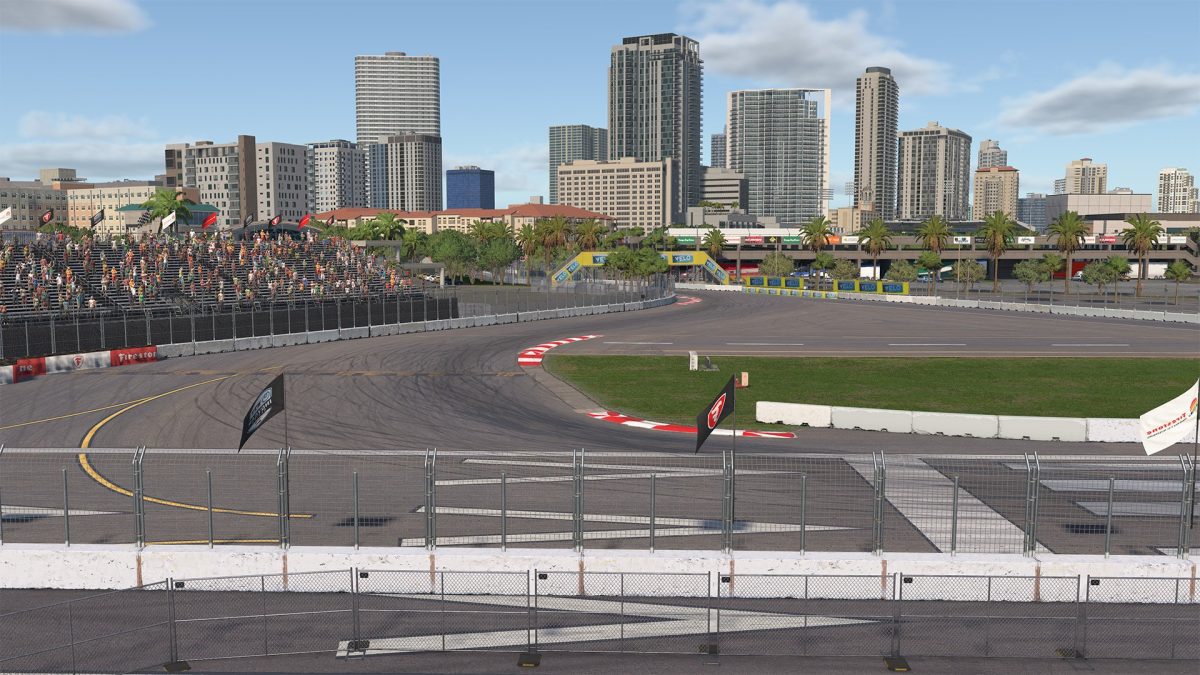
Here is every St Petersburg iRacing corner broken down from Turn 1 to Turn 14. The St. Petersburg Grand Prix circuit is 1.8 miles of street circuit through downtown St. Petersburg, Florida. 14 turns, almost no runoff, concrete barriers everywhere, and a surface that rewards smoothness and punishes overdriving. It is one of the most demanding tracks in the IndyCar calendar in real life, and that difficulty carries directly into iRacing. Here is a corner-by-corner guide to what the track demands and where you gain laps and lost.
Starting with Turn 1: The Chicane That Causes Chaos
Turn 1 is a tight right-left chicane at the end of the start-finish straight. On a clear lap it is a straightforward rhythm corner. At the start of a race, it is the most dangerous spot on the circuit.
Cars arrive at Turn 1 with different speeds depending on grid position and starting reaction time. The chicane does not give everyone room to get through clean on the first lap. The inside of Turn 1 is a common dive-bomb spot on lap one, and contact here is frequent. Your lap one priority should be survival over position. Choose your battles carefully.
On a clean lap, the ideal approach is a late turn-in to the right-hand entry, a quick flick left through the second part of the chicane. Then immediate focus on getting the car settled and pointed for the acceleration zone out of Turn 3. Any snap or oversteer correction inside the chicane costs more time than a slightly conservative line. Smoothness through this sequence pays off every lap.
Turns 2-3: Getting Settled After the Chicane
Turns 2 and 3 carry you out of the chicane and onto the first acceleration zone of the lap. The main job here is getting the car fully settled from whatever happened in Turn 1. If you are still correcting from the chicane entry by the time you reach Turn 2, you are carrying that error forward.
Turn 3 exits onto a straight where getting to full throttle early matters. Fast drivers commit to the throttle here before mid-corner drivers are. Over a race stint, that difference compounds.
Turns 4-9: The Most Technical Section on the Circuit
Turns 4 through 9 are where the lap happens or broken. This stretch of the circuit is where the fastest drivers separate from the field. It is where the most setup work is worth doing. The corners come quickly and sequentially, with almost no time to reset between them.
Turn 4 features a medium-speed right-hander approached after a brief straight. Entry is the critical phase here. Specifically, you want the car pointed and the rotation happening before the apex rather than trying to force it mid-corner. Any understeer through Turn 4 costs you in Turn 5 because you will be correcting instead of setting up the next entry.
Turn 5 immediately follows Turn 4 as a tight left-hander, and this is where the sequencing gets demanding. You are managing the exit of Turn 4 while preparing the entry of Turn 5 at the same time. The car should point at the Turn 5 apex before you are fully back to throttle from Turn 4. Learning this rhythm takes laps. Trying to rush it just creates errors in both corners.
Turns 6-9: Finishing the Technical Gauntlet
Turn 6 continues the sequence as another right-hander. By this point you should be picking up throttle. However, the exit of Turn 6 feeds directly into the approach for Turns 7 and 8 without a significant breathing space. The rhythm through this section is continuous, not a series of individual corners with recovery zones between them.
Turns 7-8 are a quick chicane with similar demands to Turn 1 but at considerably lower speed. Quick direction changes with the car as stable as possible through both parts. The lower speed makes the braking demand lower than Turn 1. However, the corner still requires commitment to the turn-in rather than hesitation. Any lift mid-chicane that disrupts the rhythm here costs you at the exit of Turn 8.
Turn 9 closes corner of this section and one of the most important corners on the circuit. It is a tight right-hander that exits onto the back straight. The relationship between your Turn 9 exit speed and your trap speed at the end of the straight is direct. A late apex here, even if it feels slower mid-corner, pays back significantly at the exit. An early apex that leaves you wide at the exit is one of the most common ways drivers lose drive onto the back straight.
The Back Straight: Where St Petersburg iRacing Corners Open Up
The back straight is the primary passing opportunity at St. Pete. If you built any advantage through Turns 7-9, the straight is where you convert it. The braking zone into Turn 10 at the end of the straight is the best overtaking spot on the circuit.
Late-braking attempts into Turn 10 are frequent in the opening laps of a race. Have your reference points established before the race starts. The braking zone arrives quickly, and losing your reference point under pressure from a car alongside is exactly where mistakes happen. Know your reference, commit to it, and adjust for traffic rather than abandoning it entirely.
Turn 10: The Heavy Braking Zone
Turn 10 is a sharp right-hander at the end of the back straight and the heaviest braking zone on the circuit. It is also the most common spot for aggressive overtaking attempts, particularly from drivers who have built a run down the straight.
The inside line into Turn 10 defends well, but committing too aggressively to the inside too early can leave you with a compromised exit into the Turn 11-13 complex that follows. The balance between defending position and maintaining exit speed through Turn 10 is a racing judgment that gets refined over laps and races at this circuit.
Turns 11-13: Precision Over Aggression
Turns 11-13 are a sequence of tighter corners that carry you through the final technical section before the last corner of the lap. This area rewards precision more than aggression. The lines are narrow, the barriers are close, and any overspeed through 11-13 compounds. There limits space to correct before the next apex arrives.
If you are losing time in this section, the most common cause is carrying too much speed from Turn 10 into the Turn 11-13 complex. Arriving slightly slower and driving a clean line through 11-13 is faster than arriving quick and spending the whole section correcting.
Turn 14: The Corner You Have to Commit To
Turn 14 is the final sweeping right-hander that leads back onto the start-finish straight. This is the commitment corner of the circuit. If you carry speed through the apex with confidence, the reward is strong exit speed onto the straight and a good position into Turn 1. If you hesitate or lift mid-corner, you pay for it in exit speed and position.
The outer wall at Turn 14 is always nearby. This is a corner where learning to trust the grip pays off more than almost anywhere else on the circuit. Drivers who commit to Turn 14 consistently lap faster than drivers who manage it cautiously, and over a full race stint the difference is meaningful. Get comfortable here in practice.
Passing Zones and Where Position Matters
The primary passing zone is the braking zone into Turn 10 at the end of the back straight. Secondary opportunities exist at Turn 1, particularly on race starts and restarts, and occasionally at Turn 5 for drivers who can generate a significant exit run from Turn 4.
Outside of these zones, St. Pete is largely a track position circuit. If you can get in front and control the pace through Turns 4-9 and the Turn 14 complex, you are in a strong position to hold. Following closely enough through the Turn 4-9 sequence to attempt a pass at Turn 10 requires a significant speed differential or a mistake from the car ahead.
Common St Petersburg iRacing Corner Mistakes
Turn 1 on cold tires at the start of a stint is the most common early mistake. The tires lack temperature, grip drops. The entry speed feels fine until it is not. Going in slightly conservative on lap one until you feel the tires coming in is worth it.
Carrying a Turn 4 error into Turns 5 and 6 is the most time-costly mistake in the technical section. Overdriving Turn 4 and ending up wide means you spend 5 and 6 in recovery mode. The time loss through this sequence is significant. It comes from one overdriving moment two corners earlier.
Early apex at Turn 9 is a consistent source of lost drive onto the back straight. It feels fast mid-corner but the exit tells you otherwise. Late apex, even if the mid-corner speed seems lower, produces a better result at the exit and down the straight.
Hesitating at Turn 14 is the other major source of lost lap time. The corner will take the speed. Commit to the apex and let the car do what it develops to do.
St. Petersburg rewards consistent drivers who know their references and execute clean laps under pressure. It is not a circuit where raw pace covers for inconsistency. Learn the sequencing, get comfortable with Turn 14, and spend your practice time in the Turns 4-9 complex. That is where this track is won and lost.